

How to Inspect an HDPE Butt Fusion Bead: Good Weld vs Common Defects
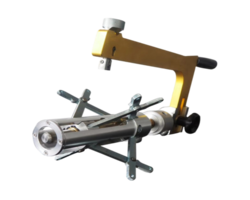
Direct answer: A sound HDPE butt fusion joint shows two uniform, rounded beads—one on each side of the weld—rolled back toward the pipe surface, with a shallow V-groove between them that stays above the pipe’s outside surface. No single visual check certifies a joint: a bead that looks acceptable can still hide a cold, unfused weld that fails later. Inspection must pair visual acceptance criteria with the recorded fusion parameters and, where specified, sampled destructive testing. The weld bead is the fingerprint of the fusion cycle. Its size, symmetry, roll-over, and the valley between the two bead halves all record what happened to heat, pressure, time, and alignment at the moment the joint was made. Reading that bead correctly is the cheapest and most immediate quality check a welder has—but it is only one link in a longer chain of evidence. This guide explains what a good bead looks like, how to interpret the common defect patterns, and why visual inspection alone is never enough to accept a joint. Butt fusion joins two square-cut pipe ends by melting them against a heated plate and then pressing them together under controlled pressure. As the molten material is squeezed, it rolls outward on both sides of the joint, forming two beads—a “double roll-back”. On a sound joint, both beads are rounded, rolled back down toward the pipe surface, and consistent in size all the way around the circumference. Uniformity in both beads is the visual signature that heat and pressure were applied evenly. Bead width scales with wall thickness—heavier walls produce wider beads—but the exact acceptable width is procedure- and machine-specific, so there is no single universal number to measure against. The one quantitative check that is widely used is the V-groove: the valley between the two beads should stay above the pipe’s outside surface, and Plastics Pipe Institute (PPI) guidance states it should not be deeper than half the bead height above the pipe surface. A valley that reaches or drops below the surface is a defect indicator. Symmetry answers a specific question: was each pipe end heated and loaded the same way? When the two beads are equal in size and shape, both ends received comparable heat and pressure during bead-up and fusion. When one bead is noticeably larger or differently shaped than the other, it points to uneven heating, uneven clamping, or a difference in how the two ends contacted the plate. Alignment is a separate but related check. A high-low mismatch—where the two pipe surfaces do not meet flush and one sits proud of the other—is a clamp-alignment problem, not a heating problem. The bead can look full and rounded while the pipe ends are offset, and that offset concentrates stress at the joint in service. Symmetry and alignment should both be checked, on both the top and bottom of the joint, before the weld is accepted. Each visual symptom maps to a likely cause—pressure, heat, time, alignment, or contamination. The table below is the quick reference used to decide what to correct before the next joint. Treat it as a diagnostic starting point, not as a substitute for the acceptance criteria in your project procedure. Three bead shapes account for most rejections, and each points in a different direction. A small, flat, or narrow bead usually means the interface pressure was too low or the heat-soak time too short: there was not enough molten material to form a full roll-over. A bead that is too large and excessive indicates the opposite—too much pressure, too much heat, or too long a soak, which over-drives material out of the joint. A rolled-back bead that is small, sharp, and lacks the smooth rounded profile is the classic “cold joint” sign. Here the pipe ends were not hot enough to fuse properly, or the plate was removed and the ends cooled too long before fusion. The bead may still form and look plausible, which is exactly why appearance alone is dangerous. If you suspect a cold joint, do not rely on the bead: review the recorded heater temperature, soak time, and changeover time against the approved procedure. For guidance on correct machine setup and how bead formation relates to the fusion cycle, review Riyang’s butt fusion welding machines and their operating parameters. Before any heat is applied, the pipe ends must be trimmed so they are square, smooth, and parallel to each other and to the hot plate. Incomplete facing leaves a gap or an angled surface that prevents full contact, and the resulting bead will show gaps or uneven roll-over. If the ends are not butting squarely—or if any offset exceeds the allowed limit—the alignment must be corrected and the ends re-faced before welding continues. Facing is not a one-time step to rush. A facer that is dull, a trimmer that is not held square, or pipe that is re-contaminated after trimming all produce the same downstream symptom: a bead that looks uneven or incomplete. When a bead suggests poor facing, re-check the pipe ends and the facer condition before making the next joint. Contamination is a leading cause of fusion defects, and it shows up as porosity, voids, or discolouration in the bead. Dust, moisture, grease, and oil transferred to the molten interface prevent the polymer chains from knitting together. Surfaces should be cleaned with disposable lint-free wipes using at least 99% isopropyl alcohol (IPA); lower-concentration wipes can leave moisture behind, which interferes with fusion. Changeover time—the interval between removing the hot plate and bringing the pipe ends together—is equally important. A long changeover lets the molten ends cool before fusion, producing a cold joint even when the heater was at the correct temperature. The changeover should be as short as practical, and it must stay within the limit set by the approved procedure. Minimising changeover is one of the most controllable ways to protect joint quality in the field. The uncomfortable truth about fusion is that a joint can look perfect and still be a cold, unfused weld that passes visual inspection and even a short-term pressure test, then fails years later in service. Lack-of-fusion joints have been shown to pass both visual checks and short-term pressure tests before failing mechanically. This is why visual inspection is described as necessary but never sufficient. What the eye cannot see is whether the interface actually fused—whether the two surfaces became one continuous material rather than two surfaces merely pressed together. Only additional evidence answers that question: the recorded fusion parameters, and destructive testing of sampled joints. Never accept a joint on appearance alone when the data record is missing or the parameters fell outside the procedure. After cooling, the internal and external beads may be removed where the project requires it—for example to restore full bore flow or to allow inspection of the root area. Bead removal should be done only after the joint has fully cooled and only as the specification allows; improper or premature debeading can damage the joint. Riyang also provides internal bead remover and external bead remover for this application. Sampled destructive testing catches the welds that look fine but are not fused. The bend-back (bent-strap) test—referenced in ASTM F2620—strips a section of bead and bends the joint back: a ductile bend that does not separate passes, while a brittle crack or separation at the fusion interface fails. For heavier walls, the guided side bend performs the equivalent check. Both tests ask the same question: does the interface behave like solid parent material, or does it part under load? A tensile test of a machined sample similarly fails the joint if it breaks at the interface rather than ductile in the parent pipe. Operator skill is central to all of this. Riyang’s training center covers the practical skills behind correct facing, alignment, and bead reading for butt fusion work. A data logger turns the fusion cycle into evidence. Modern machines record the heater temperature, fusion and cooling pressures and times, drag pressure, ambient temperature, and the operator and joint identifiers for every joint, and compare the actual profile against the qualified procedure. Joint-by-joint data logging is now best practice and is often required by contract or specification. The completed pipeline is then subject to a system pressure test, which confirms the line as a whole but does not individually certify each joint—another reason the per-joint data record matters. Some specifications also require cutting out and destructively testing a small proportion of joints, typically in the range of one to two percent, to validate the process statistically. Together, the bead, the data record, and the sampled tests form a chain where each element catches what the others miss. Stop and reject decisions are not made from memory or habit—they follow the acceptance criteria in the project specification and the applicable standard, most commonly ASTM F2620 in the United States or ISO 21307 in other regions, together with the pipe manufacturer’s approved procedure. Mandatory requirements, such as the maximum allowable V-groove depth or the changeover time limit, are set by that procedure and must not be relaxed in the field. As a working minimum, treat these as reject indicators: a V-notch valley that reaches or drops below the pipe surface (over-pressure), bead asymmetry or a high-low mismatch (alignment), and any acceptance made on appearance without a data-logging record of the fusion parameters. When in doubt, cut out and destructively test rather than accept a joint you cannot fully support. Two uniform, rounded beads—one on each side of the joint—rolled back toward the pipe surface, with a shallow V-groove between them that stays above the pipe’s outside surface. A cold weld often shows a small, sharp, poorly rolled bead, but it can also look acceptable. Confirm by checking the recorded heater temperature, soak time, and changeover time against the approved procedure. It usually indicates over-pressure during fusion, sometimes combined with misalignment. The valley between the beads should stay above the pipe surface. Contamination, moisture, or dirty surfaces. Clean the pipe ends with lint-free wipes and at least 99% isopropyl alcohol before welding. No. Visual inspection is necessary but not sufficient. A lack-of-fusion joint can pass appearance and short-term pressure tests, so pair it with data records and sampled destructive testing. A destructive field test that strips a section of bead and bends the joint back. A ductile bend passes; a brittle crack or separation at the fusion interface fails the joint. Build stronger joint-quality control across your crews: train operators on correct bead reading at Riyang’s training center, and review machine and data-logging options on the butt fusion welding machine page or contact our team for a model recommendation.1. What a uniform double bead indicates
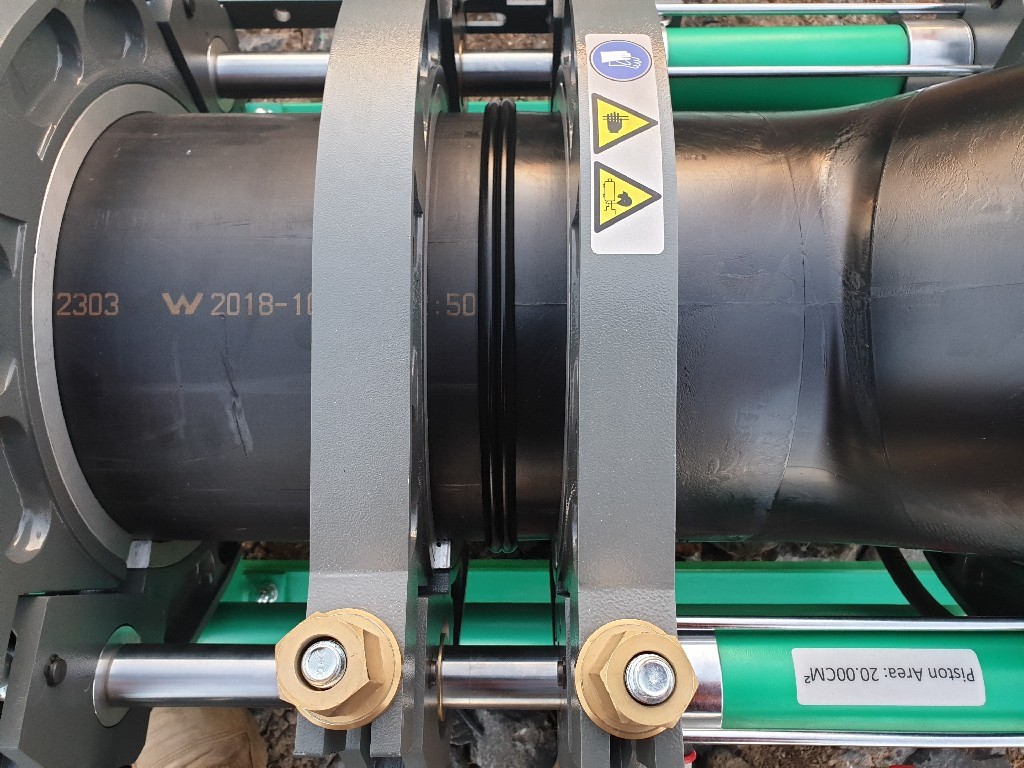
2. Bead symmetry and alignment
3. Reading the defect patterns
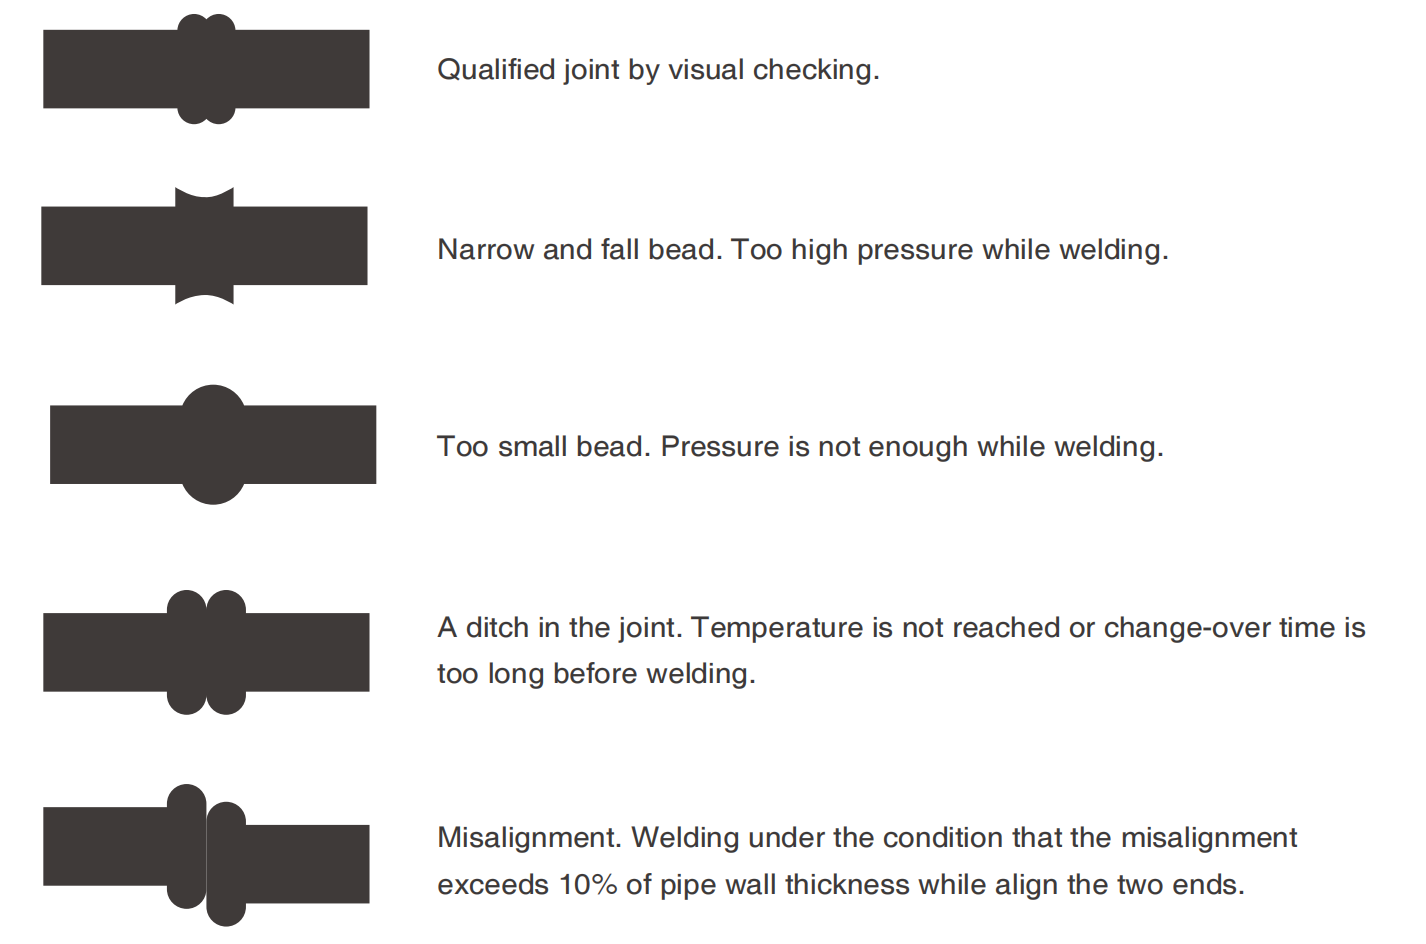
Visual symptom Most likely cause Bead too small, flat, or narrow Insufficient pressure, or too little heat / soak time Bead too large or excessive Excess pressure and/or excess heat-soak time V-notch reaching at or below the pipe surface Over-pressure during fusion, and/or misalignment Non-uniform bead around the circumference Misalignment, or a dirty / uneven heater plate Mismatch / high-low offset Alignment error in the machine clamps Porosity / voids in the bead Contamination, moisture, or dirty surfaces Incomplete bead with gaps Low heat or pressure, or poor facing Small, sharp beads with poor roll-over (cold joint) Heater temperature too low, or soak time too short 4. Small, excessive, and rolled-back beads
5. Misalignment and incomplete facing
6. Contamination, cold welds, and changeover time
7. What visual inspection cannot prove
8. Bead removal and bend-test considerations
9. Data records and pressure testing
10. Reject criteria: follow the project procedure
Key Takeaways
Frequently Asked Questions
What should a good HDPE butt fusion bead look like?
How do I tell a cold weld from a good weld?
What does a V-notch that reaches the pipe surface mean?
What causes porosity or voids in the bead?
Is visual inspection enough to accept a joint?
What is the bend-back test?
References